|
First Aid Techniques for Your Dog
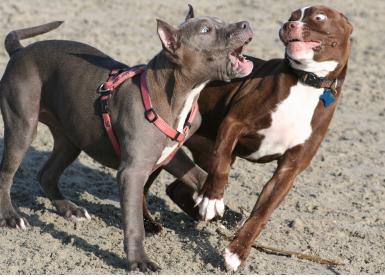
Well, it's happened--your dog has gone and gotten himself injured. Maybe he had a 'disagreement' with another dog (like these two guys)--or even with another animal. Maybe he's been stung by an insect. Or maybe he was just having fun and his big feet got in the way. Whatever it was, you'll need to contact your veterinarian first, but here are some basic first-aid techniques you can use on your CBF: First Things First The following are some signs you should check for before administering any first aid--or when to go immediately to the vet. These will also help your veterinarian get an idea of what he'll be facing if he needs to see your dog. 1. Check his temperature. Normal body temperature for a dog is anywhere between 99 and 102.5 degrees. If his temperature falls outside this range, there may be cause for concern. It's easy to take your dog's temperature. Dab a bit of lubricant (such as K-Y Jelly) on the tip of a regular digital thermometer, lift your his tail, and slowly and gently insert the thermometer into his rectum about an inch or so. He probably won't like this procedure too much, so it's helpful to have someone hold his head and distract him. Remove the thermometer when it beeps. If his temperature is between 95 and 99 degrees, he may be suffering from mild hypothermia. You should contact your veterinarian. If his temperature is below 95 degrees, this is an emergency and requires an IMMEDIATE call to the vet! On the opposite end, if his temperature is between 102.5 and 104 degrees, he's running a slight fever. This is not an emergency, but you should still call your vet. If his temperature is 105 or higher, call your veterinarian IMMEDIATELY. 2. Look at his skin and gums. They should be a healthy pink color. If they are pale to white, he may be in shock, or bleeding internally. This is a signal to call your veterinarian IMMEDIATELY. 3. Dehydration--if you suspect your dog may be dehydrated, gently lift the skin at the top of his head, pull it slightly away, and let go. It should snap right back. If it doesn't, this is a pretty good indicator of dehydration. But you can tell more accurately how dehydrated he is with the 'capillary refill time' test. The easiest way to do this is to lift your dog's upper lip and press the pad of your finger against his gums. Lift your finger and count the number of seconds it takes for the blood to refill the mark left by your finger. It should be less than two seconds; if longer than three or four seconds, this could indicate severe dehydration, which requires veterinary treatment. If he is only slightly to moderately dehydrated, the best thing to do is to offer him some water. You might also give him ice cubes to crunch. These are especially helpful if he's dehydrated due to hot weather. If he is more severely dehydrated, your vet may tell you to give your dog a rehydration fluid like Pedialyte. The unflavored variety is best--try diluting it 50:50 with filtered water and feed it to him with a needleless syringe or a turkey baster. Squirt a little of the solution in his mouth, tilt his head back, and stroke his throat gently or blow softly on his nose to get him to swallow. 4. If he has had an encounter of the unfriendly kind, examine him closely. Does he have any bite wounds? How deep are they? Is the bleeding profuse? Is he having trouble walking or is he crying out in pain? Any of these warrants a call to your veterinarian. His injuries may not appear serious, but there is always the possibility of internal damage. It's best to let your veterinarian be the judge in this situation. 5. Is he vomiting or does he have diarrhea? If so, how much? Does it have blood in it, and, if so, is the blood dark or bright red? Although his digestive tract is much shorter than yours, and he is able to eat more 'undesirable' items without suffering any consequences, sometimes he'll ingest something that doesn't 'sit right' with him, and it'll come back out. But dogs can and do get into all kinds of things that can cause serious harm or even death, such as rat poison, lawn fertilizer, and antifreeze. Vomit or diarrhea with fresh blood in it usually is the sign of something serious. This is the time to call your vet IMMEDIATELY. 6. Is he coughing or gagging? He may have something caught in his throat. Since dogs use their mouths to carry EVERYTHING (and I mean everything!), it's no surprise if something gets caught. If your dog can't force breath past whatever is stuck in there, it is imperative that you get the object out IMMEDIATELY. He could pass out and die within minutes. Use a cloth to grip his tongue and pull it out of the way. Use your fingers, blunt-tipped tweezers, or a hemostat to grasp the stuck object and pull it out. If it won't come out after a couple of quick tries, you should try a modified Heimlich maneuver: If he's a small dog (20 lbs. or under), hold him upright against your stomach, place your fist into the soft spot just underneath his ribs, and quickly and firmly thrust upward and inward. If he's a larger fellow, put him on his side and kneel behind him with your knees against his spine. Lean over and put your fist in the hollow beneath the rib cage and push sharply upward and inward. Repeat this a couple times and then check to see if the object has loosened up. You may also have to perform artificial respiration on your dog (see below). If he is breathing but is coughing or gagging, try removing the object yourself as indicated above. You may have to restrain him before you attempt this, as a panicking pup may thrash around and try to bite. Get another person to wrap him in something to contain his legs or hug him around the neck and body. Then press his lips against his teeth on both sides of the mouth. This should prompt him to open up. If the object won't come out easily, or your dog won't let you try, you can try putting your hands on either side of the widest point of his chest as he's standing and give a few firm but gentle compressions. This hopefully will knock the object loose.
Buster had an incident some years ago when he was enjoying a rawhide chew and bit off too large of a piece, which became stuck in his throat. Fortunately, I was able to reach in and pull it out with no further consequence. Needless to say, Buster doesn't get rawhide anymore. I've heard of the same thing happening to other dogs too. DOGS SHOULD ALWAYS BE SUPERVISED WHEN EATING OR CHEWING ON TOYS.
Even if you've successfully removed the offending object from his throat, call your veterinarian. He may want to see your pup anyway, since choking can cause a fluid buildup in the lungs.
If your dog appears to be in respiratory arrest, you MUST give him artificial respiration immediately until you can get him to a veterinarian. First, check to see if his airway is clear. If it appears to be blocked, pull out his tongue to dislodge whatever is in his throat, or you may reach in with your fingers or a small pair of pliers and pull it out. If it's too far down, try the Heimlich maneuver (see above). Once you're sure his airway is clear, begin respiration: 1. Depending on the size of your dog, either cradle him in your lap or lay him on his side. Straighten his neck and lift his chin so his throat opens straight into his lungs. 2. Put one or both of your hands over his mouth to seal it. Place your mouth over his nose and blow two quick breaths, checking to see if his lungs inflate. If his mouth is sealed correctly, the air will go directly into his lungs. Blow just hard enough to move his sides. If he is big, you may have to blow pretty hard, but be more gentle in a small dog or you could rupture his lungs. Let the air exhale out naturally between breaths. Keep this up until he starts breathing on his own (or you reach the veterinarian's clinic).
If your dog's heart has stopped, CPR must be performed IMMEDIATELY. To determine if his heart has stopped, you can place your ear against his lower chest directly behind his front left elbow to see if you can hear a heartbeat, or you can feel for his pulse in the femoral artery located on the inside of his thigh at the groin. Place three fingers firmly along this spot and you should be able to feel a pulse. Another indication is that he won't respond to anything, such as a hard pinch between his toes. CPR combines artificial respiration with external compressions which will help move blood through the body. Two people are necessary to perform this most effectively, as one does chest compressions while the other one performs respiration. 1. If he weighs less than 20 lbs., use the following technique: First, locate his heart by flexing his left front foreleg backward. The center of his heart is located just where the point of his elbow crosses his chest. Next, place him on his side on a flat, firm surface and cup your hand over the point of the chest just behind the elbows. With your thumb on one side, fingers on the other, squeeze rhythmically to pump the heart. The recommended rate is 80-100 compressions per minute, which may be hard to achieve without training. 60-100 compressions per minute should suffice. This technique literally squeezes blood through the heart. 2. If he is over 20 lbs., his bones are too strong and there's too much space between his ribs and heart for the above technique to be effective. Instead, perform compressions at the highest part of the chest, which will change the pressure within his chest cavity. and the compression action will move blood forward. Use both hands (as you would when performing this on a human) and push down 25 to 50%. 3. If you have a barrel-chested dog, lay him on his back with his paws crossed over his breastbone and kneel with his abdomen between your legs. Hold his paws and push downward directly over his breastbone. If he moves a lot during this procedure, lay him on his side and continue to compress as described above. Alternate between compression and breaths, one breath for every five compressions, no matter the size of your pet. Continue this technique until he is revived or you arrive at the hospital. There is yet another technique that will start his heart if CPR is not successful. Using a sharp clean needle, pin, or even your sharp fingernail (if nothing else is available), locate the midpoint of the vertical slit in his upper lip, insert the needle to the bone and wiggle it back and forth. This is an acupuncture point that, when stimulated, releases natural adrenaline to re-start his heart. You shouldn't use this to replace CPR, but it is a technique that will work if CPR does not.
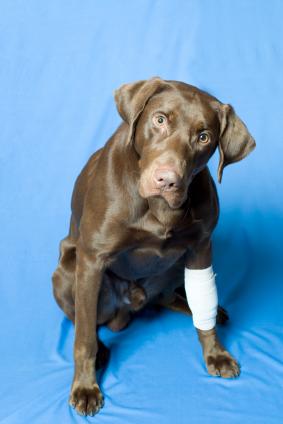
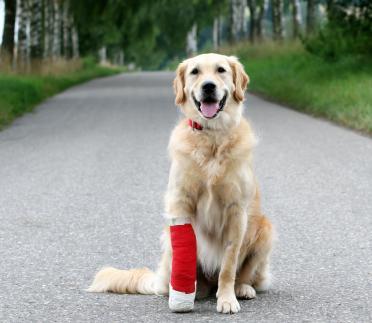
Bandaging boo-boos If your dog has suffered an injury or wound, call your veterinarian to determine if a visit is needed and/or if the injury should be bandaged. Some injuries heal best when they're left open to the air, such as superficial wounds. Other injuries should be bandaged, even if it's temporary until you get him to the vet. Bandages serve a number of purposes, including keeping dirt and germs out of the wound and preventing him from licking or biting at his injuries. If your vet has determined that the injury does not require a visit but should be bandaged, here are some tips for bandaging your CBF: 1. The wound should be cleaned out, unless it's bleeding profusely. Flushing out this type of injury may cause it to bleed even more. But if the wound isn't bleeding, cleansing will flush out dirt and bacteria that may cause infection. First, if your dog has long fur in the way, it must be clipped so it doesn't stick to the wound. Slip your first and second fingers through his fur and hold them against the wound. Clip the fur level with your fingers. Next, flush out the injury, bearing in mind that even a light touch can cause pain. The best way is to gently flood the injury with cool water or a sterile saline solution (such as contact lens solution) to wash out dirt. Follow this with a non-stinging antiseptic. You can use Betadine (a common item in your local pharmacy) diluted with clean water until it is the color of weak tea. Pour it gently over the wound, or, if you have a clean spray bottle, you may use this. Once the injury has been cleaned and disinfected, very gently dab it dry with a gauze square or a clean, dry, lint-free soft cloth. Then the wound may be bandaged. 2. For a pad that's next to the skin, make sure it's a nonstick pad (like Telfa) or any absorbent, lint-free material. Try to avoid any paper products as these stick to wounds and can be uncomfortable and difficult to remove. 3. Next, wrap gauze around the pad to keep it in place. Make sure that you don't wrap too tightly--if you can't slip a couple of fingers underneath the wrap, it's too tight. Also remember that injuries can swell; this can inhibit blood circulation. Roll gauze works best for this type of wrap; however, any elastic material will do if gauze is not available. Believe it or not, the leg from an old pair of pantyhose will work if nothing else is available! 4. Tape in place. Self-stick bandaging works great, but you can use any adhesive tape. Just make sure the tape covers a portion of your dog's fur on both sides of the bandage so it will stay put and he can't remove it. If you have don't have anything else handy, you can use plastic wrap such as Saran Wrap (yes, you heard me!!) because it's stretchy and sticks to itself. 5. Some body parts present special challenges when bandaging an injury. If you must bandage a paw, place the wounded paw on a clean gauze square, then place a doubled-over length of gauze on the from the front of his foot up over his toes and under his paw. Then wrap a single layer of gauze around his paw starting at the toes and moving up and around until the folded gauze is covered. Since dogs perspire through their paw pads, this bandage will need to 'breathe' or it will become damp, so you should only tape this bandage at the top. Then protect your dog's injury further by placing a white cotton sock (cut to fit if necessary) over the bandage and secure it at the top. You'll bandage a leg wound in the same manner, covering the injury with a pad, wrapping in gauze, and covering the whole thing with a sock. The sock prevents him from tearing off the bandage while allowing the skin to breathe. If his injury is on his tail, a similar pad-gauze-sock technique is used, except you'll tape the whole length of his tail, starting with the tip and taping in a diagonal pattern towards his body, making sure to run the tape about 2 inches past the cuff of the sock and directly onto his fur to secure it. Then diagonally wind the tape back down to the tip of the tail, criss-crossing the first course of tape. You want to make the bandage secure enough that he can't pull it off but that his skin can still 'breathe' and the bandage isn't too tight. If his ear needs bandaging, it's best to bandage the whole head. This will help to contain the injury and keep the ear where your dog can't paw at it. Place a gauze pad over the injury, fold both ears over the top of your dog's head, and secure the ends together with adhesive tape so the ears form a sort of 'cap'. Then wrap gauze over his ears and under his chin to hold the ears in place. If you don't have a roll of gauze handy, you can make a 'tube' from the sleeve of a t-shirt and place it over your dog's ears and under his chin. Make sure it fits tight enough so he can't remove it. He'll look silly, but the injury will be adequately protected. 6. To bandage your dog's chest, shoulders, hips or flanks, place an absorbent pad over the wound and wrap gauze around your dog's body in a sort of figure-eight pattern, alternating between wrapping the body and wrapping it around either his front legs or rear legs (depending on where the injury is located). Then secure with tape, making sure to catch some of his fur in the tape. The figure-eight wrap helps to hold the bandage in place, since body bandages have a tendency to slip. An even better method for bandaging the wounds on your dog's hips or flanks is to use a clean pair of men's briefs, making sure his tail is out the fly opening and taping the waistband snugly around his belly. If your dog's wounds are on his tummy or back, you can use a couple of different methods to create a non-slip bandage. The easiest thing is to slip a clean cotton t-shirt onto him and tape it securely around his middle. Or, take a clean soft towel and have your dog stand on it. Mark where his feet are, then cut holes for his legs in these spots. Slip his legs through the openings, then pin the towel securely over his back. T-shirts, men's briefs, towel wraps...it's a good thing that most dogs aren't particularly self-conscious of their appearance! But these are simple solutions to keeping your dog's wounds clean and dry. Creating a Splint If you think your dog has fractured his leg, it should be splinted until you can get him to the veterinarian. A splint will pad, protect, and immobilize your dog's leg to prevent further injury. Since the joints both above and below must be immobilized, it's easiest to splint a break in your dog's lower leg. The splint should cover the entire leg and can be made of any rigid material, such as cardboard or a rolled-up newspaper--even bubble wrap! Actually, due to its cushioning property, bubble wrap makes a very good splint. GENTLY place your dog's injured limb on the splint material, wrap the material around the limb, and tape it in place, starting at his foot and working up toward his body.
Stretcher, Please Moving your injured dog can be tricky. You don't want to further injure him or cause more pain. The best thing to to is to ease your dog onto a stretcher. To make a stretcher, GENTLY slide a piece of plywood or other rigid material under your dog. You can even use a cutting board or a large cookie sheet if your dog is a tiny guy. Then cover him with a towel or blanket and tape your dog down so he doesn't slide off the board. You can fasten the tape to the board, then run it down behind your dog's front legs and across the towel, then in front of his hind legs. In a pinch, you could even use pantyhose. Then lift up the board and place it in your vehicle for transport to the veterinarian's clinic.
If your dog gets burned, the type of first aid applied depends on what caused the burn. Dogs don't get burned from heat too often because they instinctively avoid heat. But burns from other substances, such as chemicals, can occur and require special treatment. Chemical burns require a trip to your veterinarian, but there are some things you can do before you go. The first thing to do is protect your skin and eyes (and those of anyone standing nearby) so you don't get burned too in case your dog shakes himself. Next, remove his collar. Leather and cloth collars can absorb liquid chemicals and trap them against your dog's skin. Chemical burns can also cause swelling, which can make his collar too tight. The next thing to do is to muzzle him (see above). This will keep him from licking the burn and possibly ingesting the chemical. **Note: if your dog seems to be having trouble breathing, don't muzzle him. If you think he may have already gotten some of the chemical in his mouth, you can use a large syringe (remove the needle first) or even a turkey baster to gently rinse out his mouth. The next step for this type of burn is to remove the chemical as best you can. If it's in powder form, brush it off using a stiff-bristled brush--but first make sure your nose and mouth are covered so you don't accidentally breathe in some of the dust. Then, rinse the area thoroughly with lots of lukewarm water. Try to direct the stream away from your dog so that the chemical doesn't get on any other part of him. Don't use cold water, as this may cause hypothermia. Conversely, water that is too hot could accelerate the skin's absorption of the chemical. Keep flooding the skin for at least 20 minutes. Don't put any kind of ointment on his skin, because this will trap chemical particles and possibly cause further damage. Look for symptoms of shock (see above). Dogs who have been exposed to certain chemicals can go into shock, which is a dire medical emergency! You MUST go to your veterinary clinic IMMEDIATELY. Wrap him in a blanket to keep him warm and slow down the progression of shock. You can also put a drop of honey on his gums, which will help him remain conscious on the way to the vet's. Burns from heat are not such an emergency--unless they are second-or third-degree burns or are over more than 2.5 percent of your dog's body. First-degree burns only go through the top layer of skin, whereas second-degree burns go deeper into the skin and often raise blisters. Third-degree burns go through all layers of skin and into the flesh beneath. Although third-degree burns are less painful because they destroy nerve endings, they are much more serious than second- and third-degree burns. First- and second-degree burns can usually be treated at home--but always call your vet first. The first thing to do is to flush the burn with cool water. This will clean the burn and also prevent further damage to your dog, since his skin can continue to burn even after the heat source is removed. However, if the burn is over more than the aforementioned 2.5 percent, he could be suffering from shock, and cold water will worsen the situation. After cooling the burn, trim his fur short enough so you can see the extent of the burn. Then you can determine what first aid treatments are most appropriate. If it's a burn that your veterinarian says you can treat yourself, next wash the burn GENTLY with a mild soap. Then pat it dry with a soft cloth. (Don't use cotton balls or anything similar as the fibers will stick to the burn.) Then you can apply an ointment--the best ones to use contain aloe vera, which is excellent for soothing and healing minor burns. In fact, it's a good idea to keep an aloe vera plant in your home for minor burns and other minor skin injuries, both for your dog and for the humans in your home. Aloe vera plants are inexpensive and easily available. Simply break off a piece of a leaf, squeeze out the gel inside, and apply to the injury. Apply the ointment (or aloe vera gel) to your dog's burn at least three times a day. If his burn is of the small first-degree variety, it probably will not need bandaging. Just keep applying the ointment until a scab forms. If the burn is second-degree, it will require a bit more first aid than a first-degree burn. This type of burn can get infected more easily and dogs have a tendency to lick them a lot, so this type of burn needs bandaging. (You may also have to put an Elizabethan collar on him--which will NOT make him a happy camper!!) Second-degree burns can be 'weepy', so they should be bandaged with a non-stick pad such as Telfa. Place the pad over the burn and secure with a gauze wrap. If you don't have any non-stick pads available, a gauze square or even a soft clean cloth can be used. The problem here is that this type of bandage can stick to the burn. If this happens, use a sterile saline solution (like contact-lens solution) to 'unstick' the bandage before removing it from the burn. You can avoid this by coating the pad or cloth with an antibiotic ointment such as Neosporin which will prevent sticking and also speed healing. Don't use any ointment containing steroids as these will slow down the healing. You can also use a 'wet-to-dry' bandage, which is applied wet and dries to a tight seal over the burn. You can make one of these by soaking a gauze pad in distilled water and pressing it over the wound. Then cover this with a larger dry pad and secure with roll gauze or an elastic bandage. This type of bandage may need to be changed several times for the first few days, then you can switch to a regular non-stick pad coated with antibiotic ointment. This will allow the burn to continue to drain. You'll still need to check the burn several times a day to see if the bandage is damp on the outside. If it's damp, it must be changed. To keep your dog's bandages dry when he goes outside, use a plastic bag or Saran Wrap to form a waterproof covering. Remember to remove the plastic when he comes indoors.
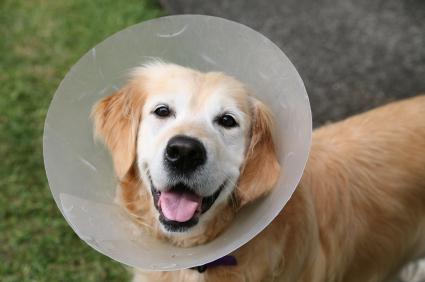
Restraining Your Dog Depending on the injury, you may have to restrain your dog to administer first aid. The technique you use depends on his size and breed. If he's a small guy, it's easiest to administer first aid if you place him on a counter or tabletop so he's at about waist level. If he is medium-sized or larger, it's best to treat him on the floor as you kneel beside him. The first technique for restraint is performed with your dog lying on his side, injury facing upward. Grasp the ankle of the leg that is resting against the ground with your hand and press your forearm across his hips. This technique works well with medium-to-large dogs as well as for pups with large eyes such as Pekingese, Shih-Tzus, or Chihuahuas. (If you use a restraint technique involving neck pressure on a breed with large eyes, it could cause their eyes to pop out of the sockets.) The second technique is useful for small dogs. Grasp him by the loose skin on the back of his neck (also known as the scruff) with one hand, hold both of his hind feet in your other hand, and stretch him out on a counter or tabletop. The third technique uses the 'safety hug'. With your pup in a standing position, place one arm underneath him and bring your hand up to grasp his shoulder while you put your other arm around his neck, holding him close against your upper body. The fourth technique, which is especially useful for the 'big-eyed' breeds mentioned above, involves kneeling on the floor with him between your knees, facing away from you. Place one hand on top of his head and the other hand around or beneath his jaw to hold his head steady. This won't place any pressure on his neck, so his eyes will stay in place. Depending on the injury, your dog may benefit from wearing an Elizabethan collar (that thing that looks like a lampshade, as our friend is sporting in the photo above). The 'traditional' collar is made from flexible plastic and can be cut to fit, but a newer inflatable variety is available. It looks a lot like a child's swim ring, is more comfortable, and is not as unwieldy as a plastic collar. However, I can almost guarantee that your pup will NOT like wearing either style and will try his best to remove it. When he discovers that he can't get it off, be prepared for a very grumpy canine!!
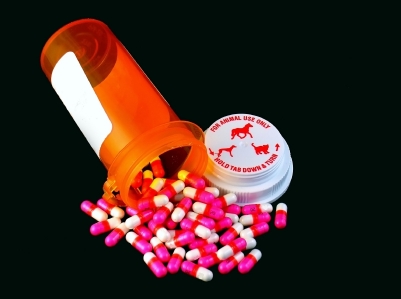
Got Meds? If you and your dog have paid a visit to the vet, and you've been given medication to administer at home, you may find that your dog isn't exactly pleased to take his pills. You might try hiding them in a bit of peanut butter (I've yet to meet a dog who doesn't LOVE peanut butter!) or try rolling them up in a piece of cheese or lunchmeat. Unfortunately for us, Buster is a little too wise to these tricks and inevitably, the pill ends up on the floor, coated with saliva. (Yuck.) What usually works for us is to cup Buster's jaw from the bottom and use thumb and middle finger to squeeze in gently on his cheeks. This pops his mouth open, and then we quickly insert the pill into his mouth as far back as we can. We then gently hold his muzzle closed and either stroke his throat or blow gently on his nose. Either one of these causes him to swallow.
If your dog is a smallish guy, here's a great idea to help you administer medication. Click here to see the Medabed!
|